When spring is in the air, we are increasingly keen to spend our time outside the walls of the buildings. The warm rays of the sun put us in a better mood, and being surrounded by greenery is soothing. A perfect solution for a green corner is a gazebo, where we can organise summer parties for friends or enjoy warm evenings with the family. How do we build it and what do we need to know before we start? With the right products, such a challenge is not difficult!
What is a gazebo?
A garden gazebo is a lightweight structure of various shapes. Most often made of wood, it consists of posts placed in the corners, floor, walls and roof. We usually spend time in this type of structure in spring and summer, when the weather is nice and warm outside, so often walls are not installed to restrict our view, nor is it necessary to install a floor.
Legal requirements
According to the law, no building permit is required for gazebos that we erect in private gardens or allotment areas if the built-up area does not exceed 35 m² and a certain height (5 m for steep roofs; 4 m for flat roofs). It is worth knowing that the built-up area does not include a terrace, veranda or porch as long as their total area does not exceed 12 m².
In addition, the number of gazebos must not exceed two, for every 500 m2 of plot area.
To build a gazebo, it is enough to submit an application to the appropriate city, commune or district authority. In the application, we need to specify the scope of work, the manner in which the construction work is to be carried out, as well as the starting date. If you have a design of a gazebo, it is advisable to attach it as additional documentation.
If we do not receive any letter within 21 days from the date of submitting the documents, it means that the authority has given us the so-called tacit approval for the construction.
A garden gazebo that does not meet all of the above requirements is subject to building permit.
If a building permit is required, the formal matters are more complicated. To begin with, we need to obtain planning conditions. This will tell us whether the construction of a gazebo will be possible at all. Secondly, an application for building permit must be submitted. The application must be accompanied by additional documents, such as
- design of the gazebo,
- situation and altitude map in a scale of 1:500,
- statement about the right to use the property for construction purposes,
- additional declarations and agreements resulting from the local law,
- location of the gazebo on the plot.
A building permit is issued by the district authority within no more than two months from the date of submission of the documentation. In addition, it is the investor’s responsibility to notify the district authority of the intention to commence construction one week prior to the commencement of work.
As can be seen from the above, it is much simpler to erect a gazebo smaller than 35 m².
Selecting the site and design of the gazebo
The first important step in building a gazebo is to select a site. Select the location carefully. It’s best to build it deep in the garden – away from the street, in a quiet place, hidden from the sight of outsiders, but at the same time in such a place that you can observe the beautiful green belt. It’s a good idea to think about the location even before you start designing your garden – this way you can mark out paths and determine exactly where, for example, to sow grass or plant trees, shrubs and flowers.
At the same time, when selecting a location, it is important to consider what shape of gazebo suits your garden. If we want to build it close to the house, we can do so with the same materials as the building. Then, it will be advantageous if its appearance relates to the architecture of the dwelling. For example, when our house is modern, it is advisable to build a simple cube-shaped gazebo with a flat roof. On the other hand, if you like the classic style, select designs with, for example, a pitched roof.
Round and polygonal gazebos are very popular – impressive, but quite demanding and labour-consuming to build. Simple gazebos designed on a square or rectangular plan are more practical. Such a solution is a good idea, especially when maximum use of space is important. The interior of the gazebo is then more ‘arrangeable’.

Important!
A gazebo with walls cannot be erected anywhere on the plot. Building regulations specify the minimum distance of such a structure from the plot boundaries. This distance must be at least 1.5 metres or even 3 or 4 metres, depending on the type of development, placement of the building on the neighbouring plot or zoning plans. Garden gazebos that do not have walls can even be built directly at the plot boundary.
Wooden garden gazebos
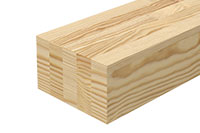
Wooden garden gazebos are the most popular due to their timeless appearance and relatively low cost of construction. Wood blends well with most garden arrangements and remains easy to work with and pleasant to the touch.
Pine and spruce wood is the most popular for gazebos as it is the cheapest raw material. Such wood is also quite soft. Noble species such as oak or larch are used less frequently – they are more durable, but also more expensive. All wood needs to be protected against weathering, fungal diseases and pests. It is best to pressure-impregnate all the elements that will be used for construction, because during this process the preparation penetrates deep into the material. You can also do it yourself by painting boards and other structural elements with impregnants. If you want the gazebo to have a different colour, it can be additionally covered with a coloured varnish or oil for wood. It is also worth knowing that every few years the wood needs to be maintained, i.e. cleaned, dried and the preservative reapplied.


Construction of a gazebo with Klimas Wkręt-met products
When we have selected the place and design of the gazebo, we can proceed to its construction. The undertaking starts with preparing the ground, i.e. levelling the place where our summer house is to stand. Additionally, the area should be paved.
If you plan to build a wooden structure, remember to separate the gazebo from the ground.
The next stage is to build the base of the gazebo, e.g. the footings, which will guarantee its stability. The footings should be set in the ground 70-80 cm deep and no more than 100 cm apart. In addition, make sure they are 3 times larger than the surface area of the structural post.
LB, LB-9, KOP, KK, KOW ANCHORS
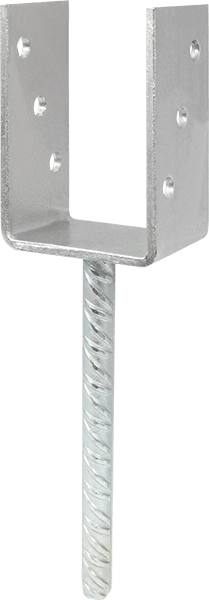
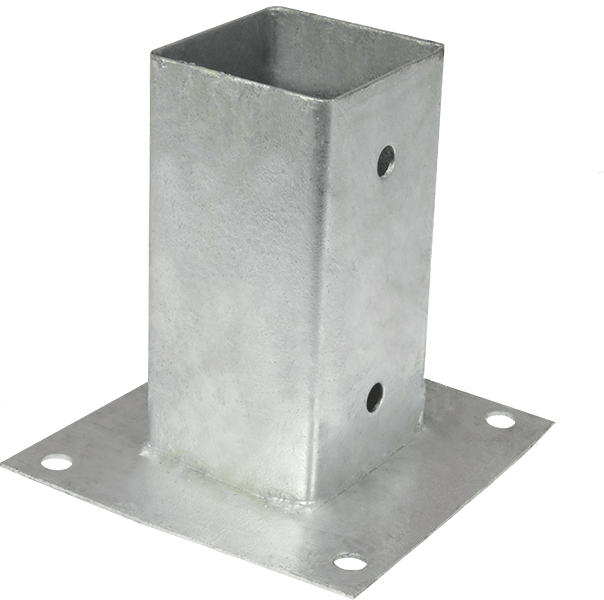
A solution that will make our work easier is to place LB or LB-9 anchors in the footings, to which we will then attach the structural posts. We can also use the KOP garden anchor or KK anchor angles from the Klimas Wkręt-met offer to embed them.
In the case of lightweight structures, footings are not always necessary; sometimes it is enough to use KOW post anchors, which will stabilise the wooden posts directly in the ground. For heavier structures, you can think about pouring foundations under the gazebo. However, this will increase the construction time and cost of our investment and at the same time is a more difficult task.
WKCP

After preparing the foundations, we can start installing the wooden structure. The posts in the footings are fixed with WKCP constructional wood screws. These screws have a special wax coating, which is applied to the carpentry screws during the producing process, making the screwing resistance lower and the installation quick and easy. Less friction during screwing also reduces energy consumption, which is particularly important in battery-powered tools.
WN/HNT/WT


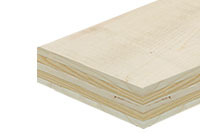
At the same time as constructing the walls, we can start laying the floor. Several technologies are recommended: slabs, concrete, stone, paving stones and wood.
In the case of a wooden floor, it is important to remember that it should not come into contact with both earth and concrete. If we take care of this, it will be more durable and less exposed to moisture. We usually install the wooden floor on joists that are properly levelled and fixed to the foundation. For the installation of the floor boards themselves, we need WN/HNT/WT decking screws, which we use depending on the type of elements we are using.
WB, WBW, WKCP/WKC/KMWHT
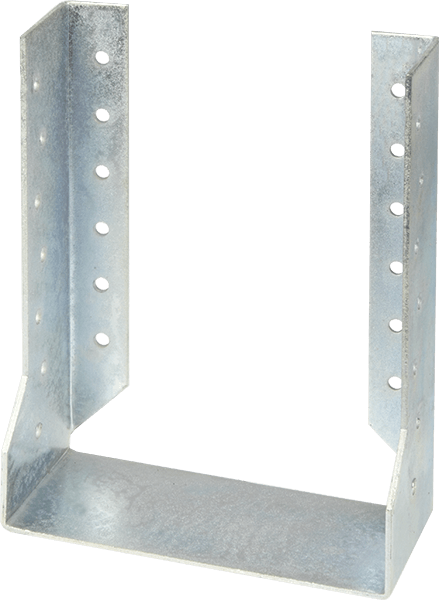
Once the floor and all the walls have been fixed, the next step is the roof. We install it to the wall plates that connects the gazebo walls to the roof structure. The installation of this part is one of the more difficult stages of gazebo construction. Depending on the type of roofing, the layout will vary. The main work is to create the timber frame, which should be solid, durable and correctly assembled. Selected carpentry fasteners, nails and carpentry screws can be used to connect the roof structure. WB, WBW joist hangers, CLG bendable brackets, KG bendable angle brackets will be most useful. At this point, it is worth looking at the Klimas Wkręt-met catalogue, where you can find many other fasteners that can be useful, for example, when fixing less typical elements in wooden structures.
WKCP/WKC/KMWHT are construction screws that will certainly make work easier and faster. They have a special milling tip, which makes it easier to start screwing and prevents the wood from cracking. The cutting notches located on the thread cut through the fibres of the wood structure – making work with this product smooth and effortless. In the case of WKCS/KMWHT countersunk screws, the cutting ribs located under the head ensure that the screw is fully countersunk and flush with the material, which gives an aesthetic end result.
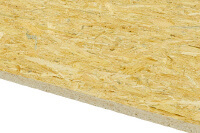
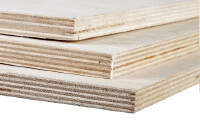
Once the roof framework is in place, the next stage is the roof covering. We can cover the roof with roofing paper, straw, thatch, shingles or sheet metal. We can also cover it with clay tiles, the same as the house for example. In this case, it is important to pay attention to the weight and include it in the design. In the case of roofing paper, straw or shingles, we first need to completely cover the roof with boards or OSB, for example, and only then apply the material we have chosen.
Once the gazebo has been completed, all that remains is to furnish it. Appropriately selected furniture will ensure comfort and proper rest. The pleasure of spending time will be even greater if we take care of the surroundings of the structure. Shrubs or flowers in bloom will surely be a delight on summer afternoons, and their fragrance even in the evening will be a relief after a hard day at work.
Related Products

European Technical Assessment ETA-18_0817
Declaration of performance No 140/SZ/19
Product data sheet WKCP